Initial Project Setup
Before we can start building scenes, a few project setup steps are required. With your project open in the Godot Editor, go to Project > Project Settings to open the settings dialog.
Set the Main Scene
Every slide, widget, and other UI file in Godot is called a "scene". When your Godot project runs, it needs to know which scene to load as its entry point.
When using GMC, the main scene will be the "window", the foundation on which all the rest of GMC is built. Each project has a single Window scene that initializes GMC, opens a connection to MPF, and mounts the "display" scenes that correspond to the screen (or screens) that your pinball machine has.
As your project becomes more complex and your knowledge of Godot improves, you may want to build a custom startup scene for your game. In the meantime, GMC comes with a default Window scene to get you started.
Since your Godot project is brand new, you need to tell it what scene is the entry point. On the left menu bar of Project Settings, select Application > Run and in the Main Scene picker, navigate to /addons/mpf-gmc/slides/window.tscn and select that to be your main scene.
Set the Window Size
If you only have one display for your game, your Window size will be the size of that display. If you are using multiple displays, the Window size will be the size of the box necessary to encompass all of the displays.
On the left menu bar of Project Settings, select Display > Window and set the Viewport Height and Viewport Width to the height and width of your display. Not only will this set the window size when you run the project, it will also set default guidelines on the scene editor to help you lay out your slides.
The other settings here will be customized later, including windowed/fullscreen mode, window position, and borderless. However, now is a good time to uncheck Resizable to prevent the window from being resized.
You can now close the Project Settings and save your project.
Configure the Audio Busses
Godot manages audio through a series of buses that feed into the Master audio bus for output to speakers. You can configure as many audio buses as you'd like, and most pinball projects use a standard set of three: music, effects, and voice.

Each bus can be configured with its own parameters for how it plays back sounds (e.g. music plays one file at a time, voice plays files sequentially, and effects play files simultaneously), how it ducks for other buses, and which bus is the default.
Create Buses in Godot Editor
At the bottom panel of the Godot Editor there is a tab called Audio which will bring up the audio control panel. By default your new project only has one bus, "Master", which is the main audio output.
Change from MPF 0.5 Terminology
In MPF 0.5 the various buses that fed the main audio output were called "tracks". This could be confusing sometimes, because a music file is also referred to as a track and mixing sound loops is known as layering tracks.
Godot uses the term "buses" instead of "tracks", and GMC will follow this pattern. As a result, an MPF project previously built for MPF 0.5 will need to update sound_player config entries to use bus: instead of track:.
Click on the Add Bus button to add a new bus and name it "music" (case sensitive). Do the same for "effects" and "voice", or customize the buses to what you need for your project.
Configure the Busses in GMC Config File
Unfortunately, Godot Audio Buses are not extensible like Nodes, so GMC cannot create customization options directly on the buses. Instead, a GMC configuration file will be used to configure the audio system.
Create a new text file in the root of your project called gmc.cfg and paste in the following:
    [sound_system]
    music={"type": "solo"}
    effects={"type": "simultaneous", "simultaneous_sounds": 3, "default": true}
    voice={"type": "sequential"}
You may then adjust these defaults if you've customized your buses, but otherwise this configuration will take care of you for a while. Save the gmc.cfg file and close it.
Create an Attract Mode slide
The first slide we will create is for Attract mode, so we can connect to MPF and verify that GMC is working properly. Slides can live in either a slides folder in the project root, or in a slides subfolder under any mode in your project modes folder (e.g. /modes/attract/slides). Create a slides folder in either location, and then in the Godot FileSystem panel right-click on the slides folder and select Create New > Scene.
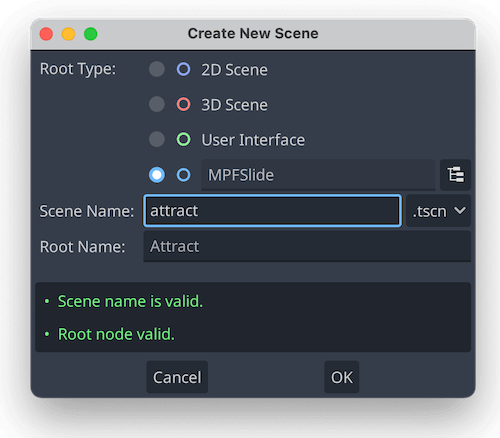
Every slide in GMC must derive from the custom MPFSlide class, so in the Create New Scene dialog under Root Type click on the tree icon to pick a custom node class. Search for and select the MPFSlide class. Enter the name of your slide "attract" as the scene name, and press OK to create the scene.
Decorate the Attract slide
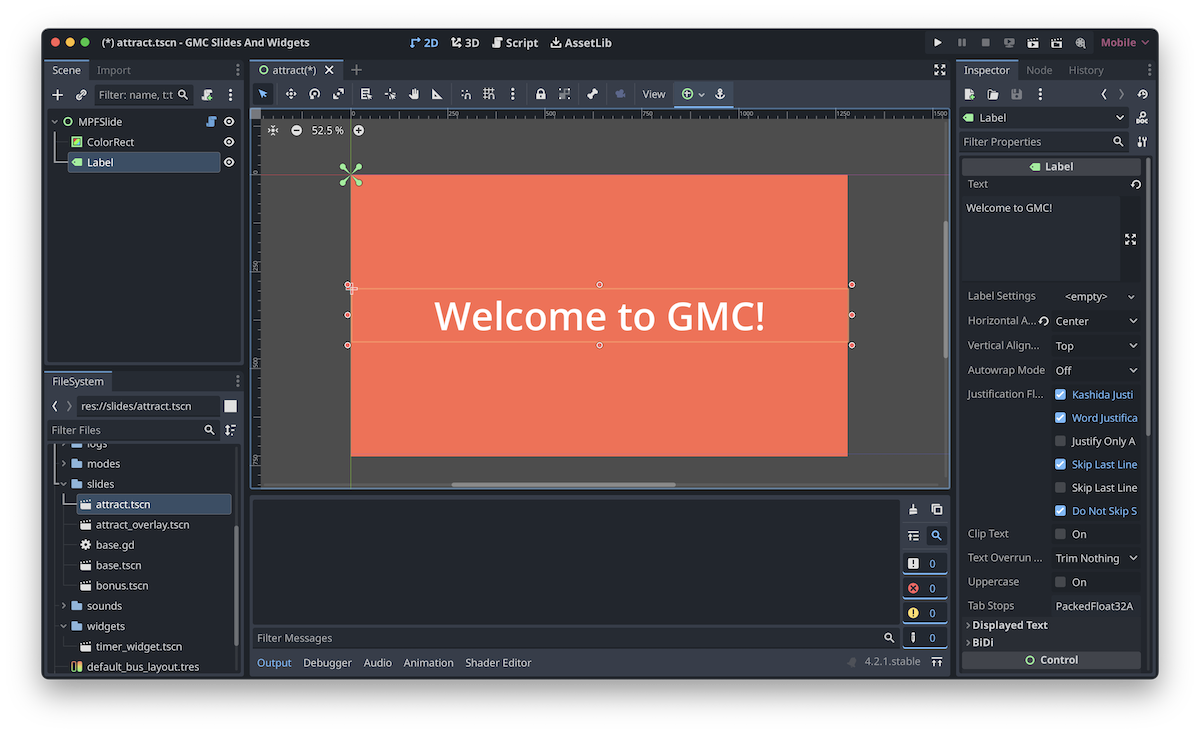
You'll now be at the Scene Editor view for the attract slide, which is empty. We'll start by adding a nice background color: In the Scene panel in the upper-left, click on the + icon to add a new node. In the node panel, search for and select ColorRect to add a colored rectangle to the scene. Drag the rectangle's corners to fill the purple dimensions on screen (which correspond to your Window size). Use the color picker in the Inspector panel to set a nice color.
Tip
You can enable grid snap to help get the rectangle node in the correct place, or you can manually enter the size to make it exact. In the Inspector panel on the right, go to Layout > Transform > Size to enter the exact dimensions you want.
Next we'll add some text to the slide. Back at the Scene panel, add another node and this time search for and select Label. Move the node to the middle of the slide and expand it to the full width of the slide.
In the Inspector panel, in the Text field type in the text "Welcome to GMC!", set the Horizontal Alignment to Center, and under Theme Overrides > Font Sizes set a nice big font, like 100px.
Run MPF
In your attract.yaml mode config, add the following block:
    slide_player:
        mode_attract_started: attract
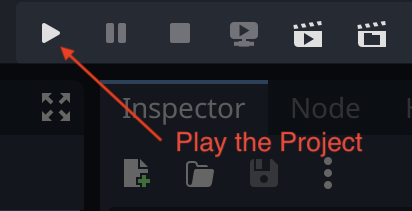
You are now ready to run GMC and connect to MPF! Save the project and in the upper right corner of the Editor, click on the Play icon. You will see a window appear with the MPF logo, which is the default startup scene from GMC.
In your terminal, in your project folder with your virtual environment activated, run mpf -xt to start MPF.
Advanced Users: Command Line
Godot can be run from the command line without the Editor open. Simply run the godot executable from within the project folder. You can add the -f argument for fullscreen mode.
For Mac users, you'll need to symlink the godot binary from the Godot.app to a path-executable. It might look like this:
sudo ln -s /Applications/Godot.app/Contents/MacOS/Godot /usr/local/bin/godot
Create a Keymap
For testing your game, it's convenient to setup a keyboard map for using keys to simulate switches and events without a connection to a physical machine.
See the GMC Keyboard Guide for guidance on creating keyboard mappings for your game.
Something missing or wrong? You can fix it!
This website is edited by people like you! Is something wrong or missing? Is something out of date, or can you explain it better?
Please help us! You can fix it yourself and be an official "open source" contributor!
It's easy! See our Beginner's guide to editing the docs.
Page navigation via the keyboard: < >
You can navigate this site via the keyboard. There are two modes:
General navigation, when search is not focused:
- F , S , / : open search dialog
- P , , : go to previous page
- N , . : go to next page
While using the search function:
- Down , Up : select next / previous result
- Esc , Tab : close search
- Enter : go to highlighted page in the results