How to configure a "split screen" display
This is an example walk through of how to create a screen that is split into several smaller screens that can be independently controlled. Let's create a layout similar to Wizard Of Oz with four quadrants and a score display area at the bottom.
1. Create the displays
Let's start by defining the displays we will need for the layout. Remember that displays are an internal representation of a blank canvas that holds graphical content. They are logical and are targets for showing slides. We will need to define and configure five displays for this layout: one that covers the entire window area, and four smaller ones that will each be used for one of the four smaller quadrant displays.
#config_version=5
window:
  width: 1280
  height: 720
  resizable: false
  fullscreen: false
  borderless: true
  exit_on_escape: true
displays:
  window:
    width: 1280
    height: 720
  upper_left:
    width: 580
    height: 260
  upper_right:
    width: 580
    height: 260
  lower_left:
    width: 580
    height: 260
  lower_right:
    width: 580
    height: 260
2. Create the layout slide
The next step is to decide on the details of the layout. The following diagram shows the layout we will be creating, along with the lower left and upper right coordinates of each display widget based on a 1280 x 720 pixel main window.
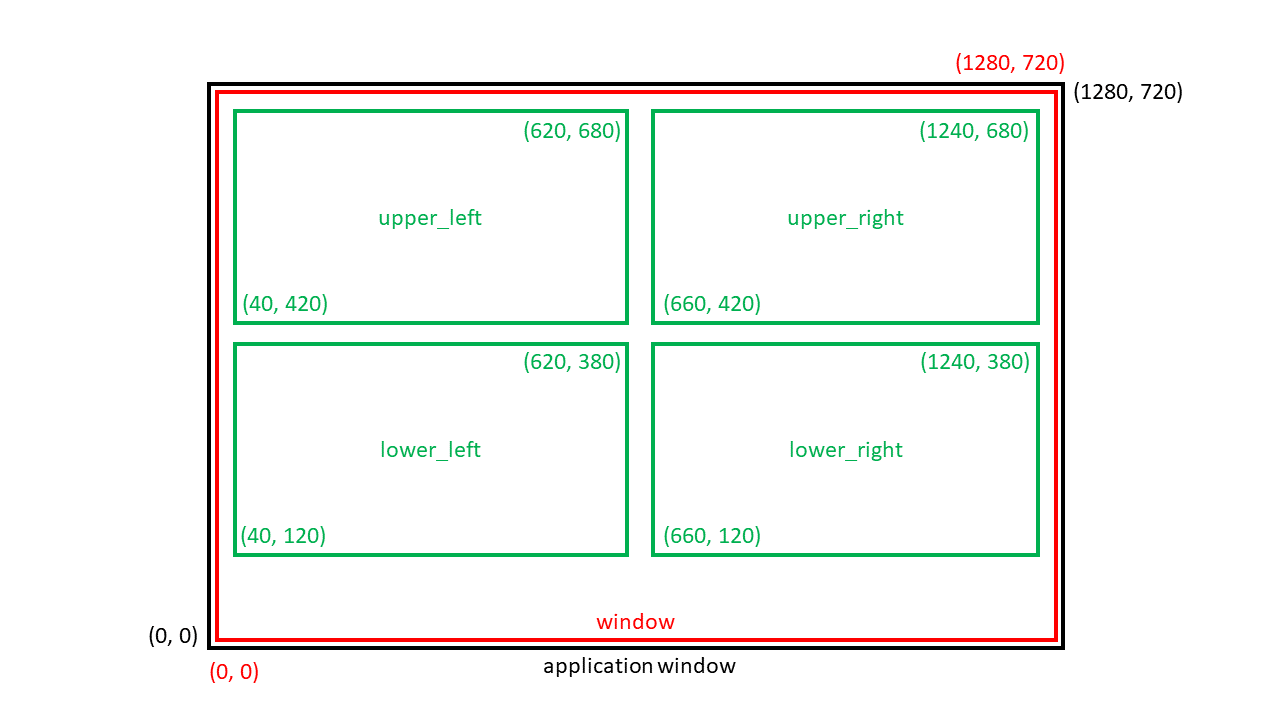
To accomplish this in MPF, we will need to create a slide that will be
shown in the main window display that will contain display widgets for
each of the four smaller displays. The source_display: attribute of
each display widget will be set to the corresponding display name that
we want to display in each quadrant.
Note
While the display widgets will automatically scale the display contents to fit in the widget boundaries, it is recommended you use the same size display widget as the source display for the best visual results.
#! displays:
#!   window:
#!     width: 1280
#!     height: 720
#!   upper_left:
#!     width: 580
#!     height: 260
#!   upper_right:
#!     width: 580
#!     height: 260
#!   lower_left:
#!     width: 580
#!     height: 260
#!   lower_right:
#!     width: 580
#!     height: 260
slides:
  layout_4_mini:
    background_color: red
    widgets:
      - type: display
        width: 580
        height: 260
        x: 40
        y: 420
        anchor_x: left
        anchor_y: bottom
        source_display: upper_left
      - type: display
        width: 580
        height: 260
        x: 660
        y: 420
        anchor_x: left
        anchor_y: bottom
        source_display: upper_right
      - type: display
        width: 580
        height: 260
        x: 40
        y: 120
        anchor_x: left
        anchor_y: bottom
        source_display: lower_left
      - type: display
        width: 580
        height: 260
        x: 660
        y: 120
        anchor_x: left
        anchor_y: bottom
        source_display: lower_right
      - type: text
        text: Split Screen Layout Example
        y: 60
slide_player:
  mc_ready:
    layout_4_mini:
      target: window
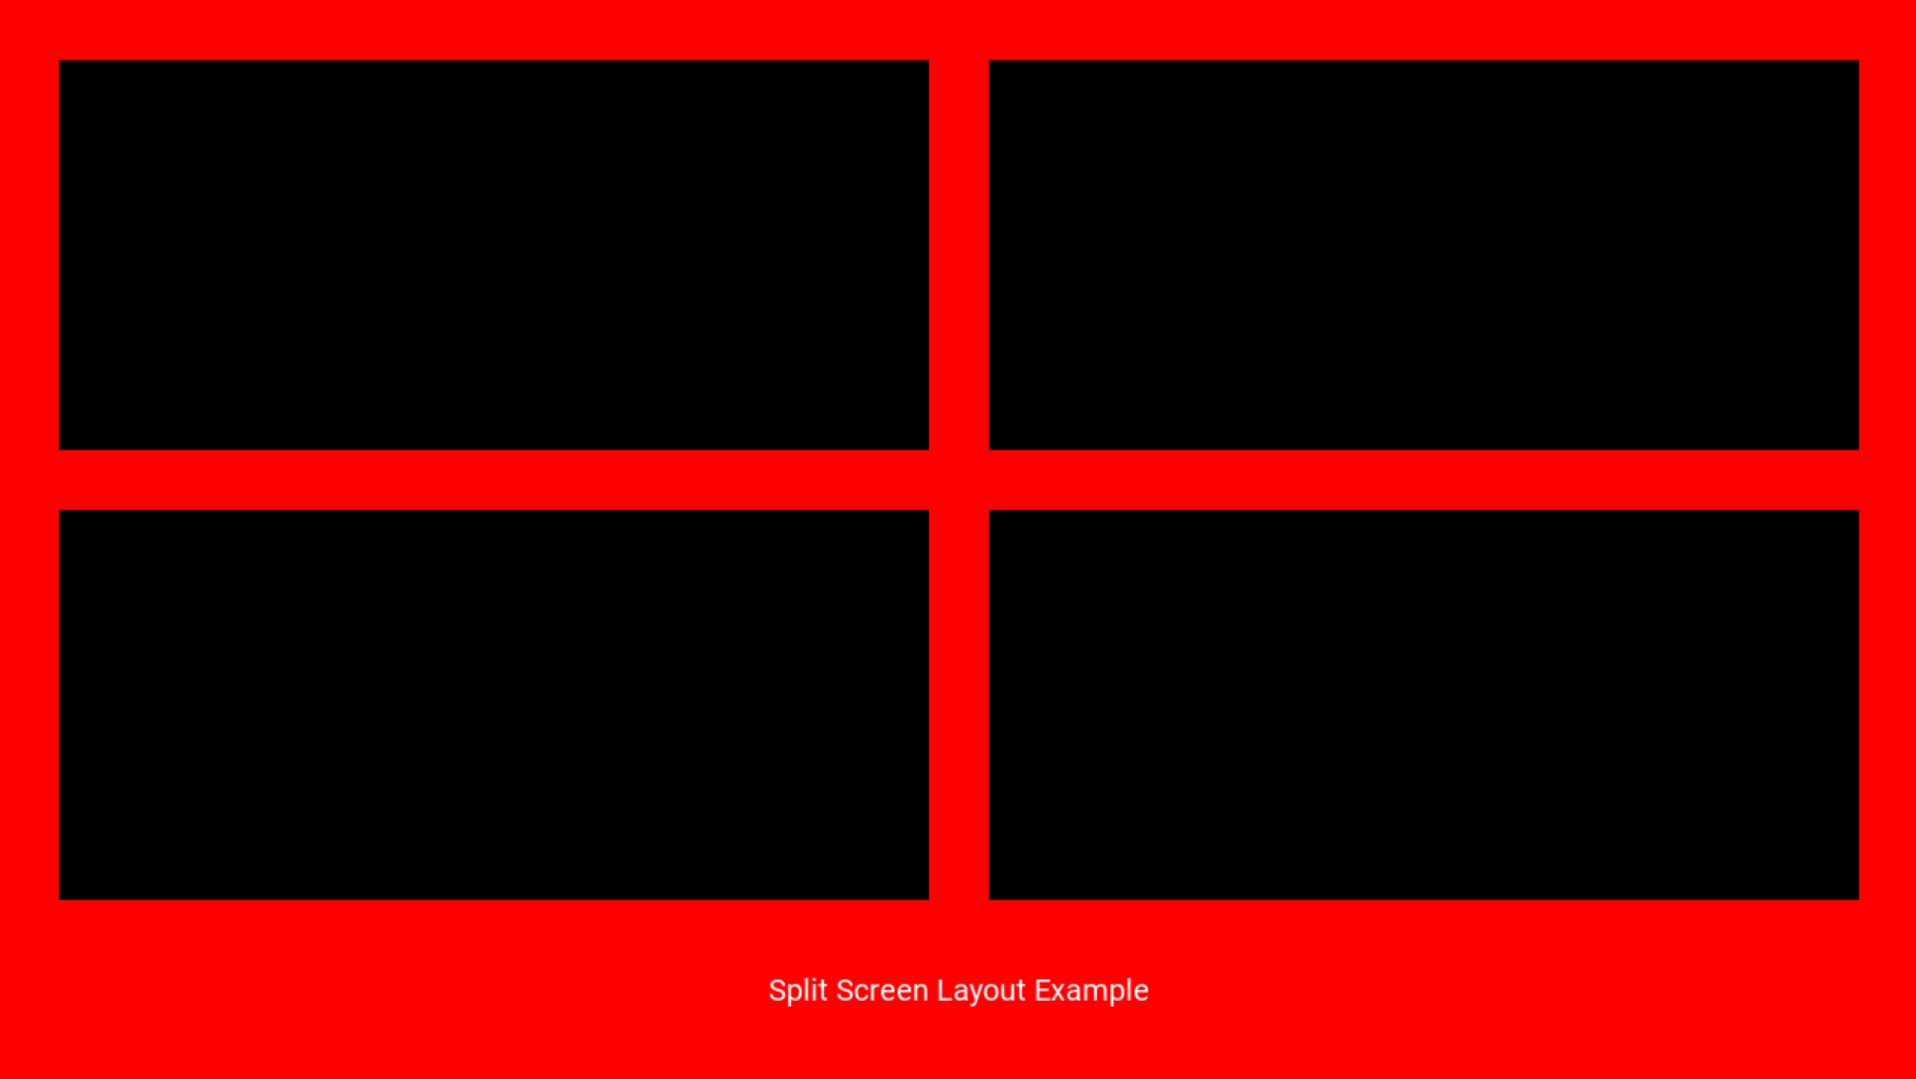
The above config will display the layout_4_mini slide we just created
as soon as the media controller is ready. Here is the result of the
above config:
3. Create additional slides and show them on one of the smaller displays
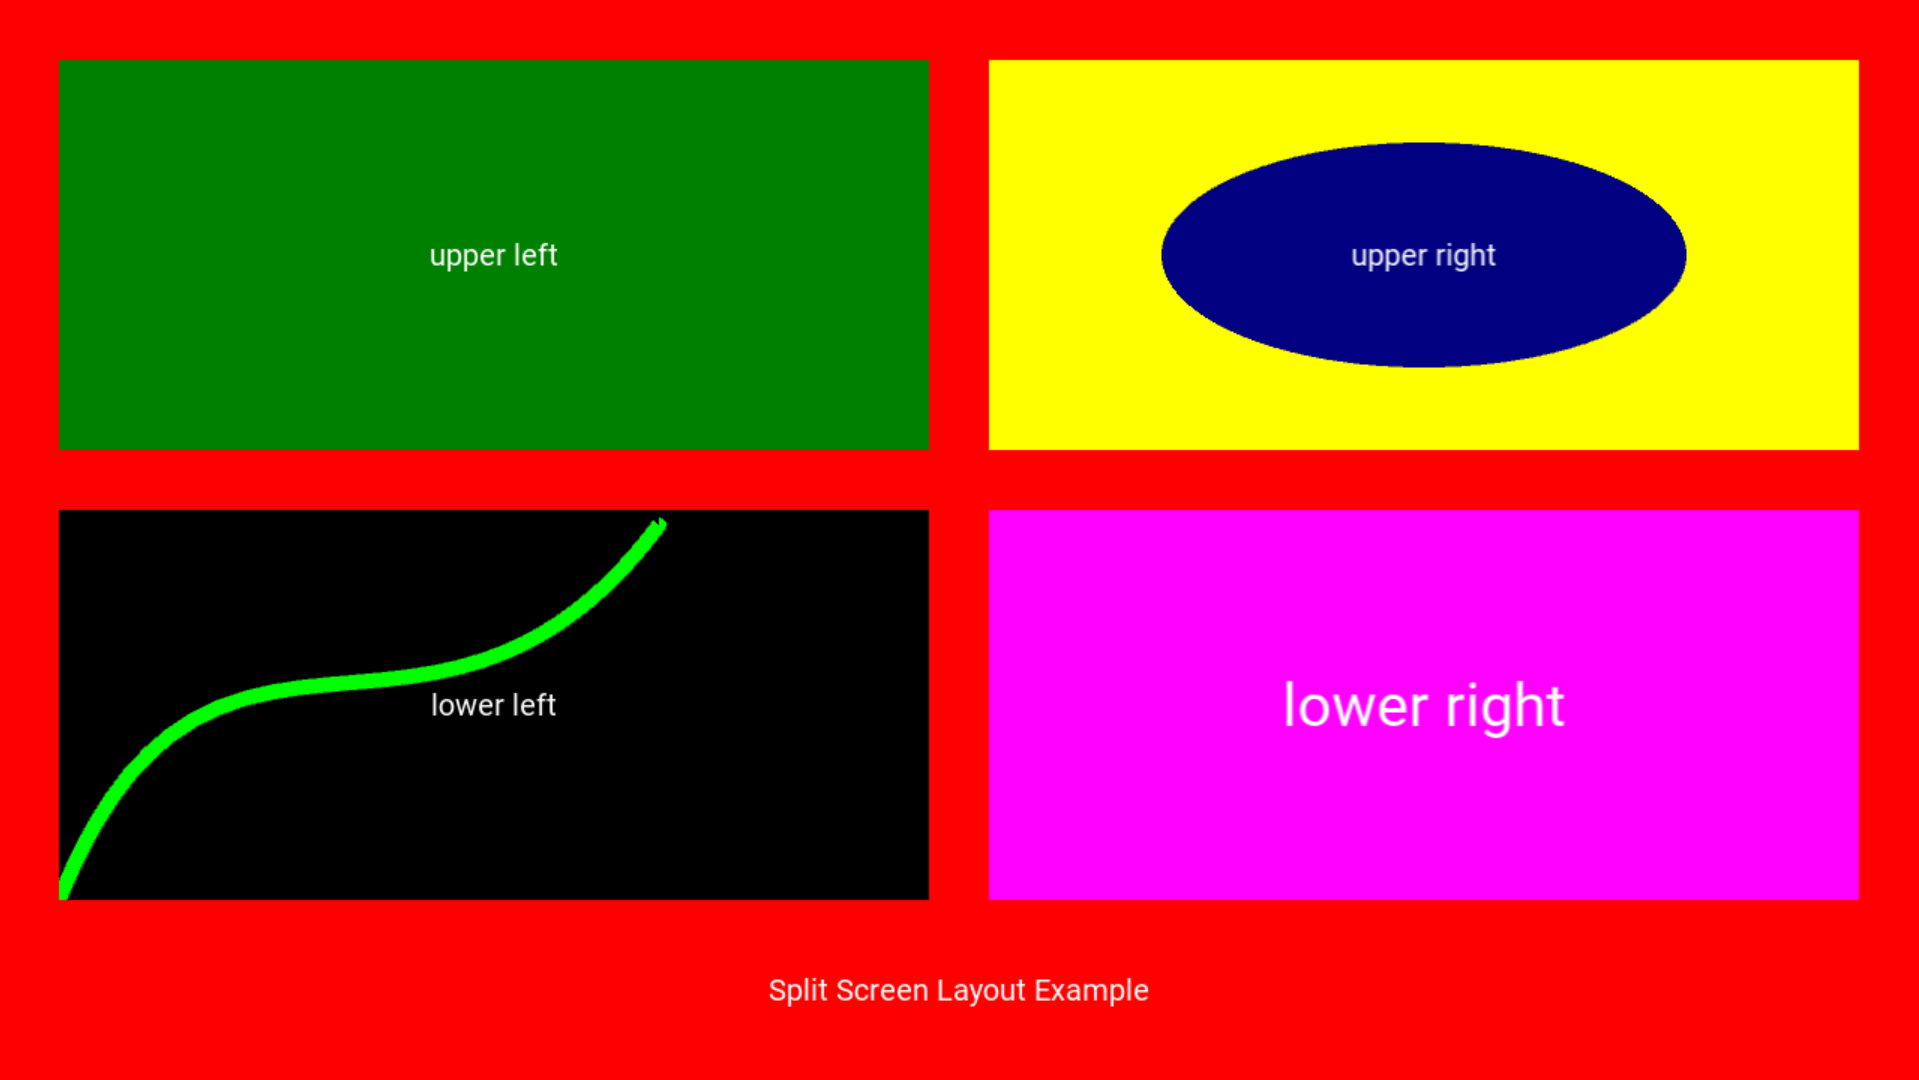
Now that we have the desired layout, we can create additional content to show in any one of the smaller displays. It is just as simple as creating slides and setting their target value to the name of the desired display when showing them. Here is our example from the previous steps that has now been extended to show a simple slide in each of the four quadrants:
#config_version=5
window:
  width: 1280
  height: 720
  resizable: false
  fullscreen: false
  borderless: true
  exit_on_escape: true
displays:
  window:
    width: 1280
    height: 720
  upper_left:
    width: 580
    height: 260
  upper_right:
    width: 580
    height: 260
  lower_left:
    width: 580
    height: 260
  lower_right:
    width: 580
    height: 260
slides:
  layout_4_mini:
    background_color: red
    widgets:
      - type: display
        width: 580
        height: 260
        x: 40
        y: 420
        anchor_x: left
        anchor_y: bottom
        source_display: upper_left
      - type: display
        width: 580
        height: 260
        x: 660
        y: 420
        anchor_x: left
        anchor_y: bottom
        source_display: upper_right
      - type: display
        width: 580
        height: 260
        x: 40
        y: 120
        anchor_x: left
        anchor_y: bottom
        source_display: lower_left
      - type: display
        width: 580
        height: 260
        x: 660
        y: 120
        anchor_x: left
        anchor_y: bottom
        source_display: lower_right
      - type: text
        text: Split Screen Layout Example
        y: 60
  slide_1:
    background_color: green
    widgets:
      - type: text
        text: upper left
  slide_2:
    background_color: yellow
    widgets:
      - type: text
        text: upper right
      - type: ellipse
        color: navy
        height: 150
        width: 350
  slide_3:
    widgets:
      - type: text
        text: lower left
      - type: bezier
        points: 0, 0, 100, 250, 250, 50, 400, 250
        color: lime
        thickness: 5
  slide_4:
    background_color: magenta
    widgets:
      - type: text
        text: lower right
        font_size: 40
slide_player:
  mc_ready:
    layout_4_mini:
      target: window
    slide_1:
      target: upper_left
    slide_2:
      target: upper_right
    slide_3:
      target: lower_left
    slide_4:
      target: lower_right
The above config results in the following output:
4. Conclusion
You should now have a good working example on how to create a split
screen layout and how easy it is to target your slides to a specific
display. You could easily extend this example to display the current
scores in the bottom section of the layout or put nice frames or other
graphics around the displays. Remember, if you target the window
display with a different slide your layout_4_mini slide will be
replaced and your nice 4 quadrant layout will no longer be visible. This
allows you to have an infinite number of possible layout slides and
change them according to the context of your game.
Something missing or wrong? You can fix it!
This website is edited by people like you! Is something wrong or missing? Is something out of date, or can you explain it better?
Please help us! You can fix it yourself and be an official "open source" contributor!
It's easy! See our Beginner's guide to editing the docs.
Page navigation via the keyboard: < >
You can navigate this site via the keyboard. There are two modes:
General navigation, when search is not focused:
- F , S , / : open search dialog
- P , , : go to previous page
- N , . : go to next page
While using the search function:
- Down , Up : select next / previous result
- Esc , Tab : close search
- Enter : go to highlighted page in the results