Tutorial 17: Add lights (or LEDs)
This is part of our Getting Started guide.
The guide starts here.
It's been awhile since this tutorial has been updated. If you find anything that is no longer relevant, please let us know, or better yet, edit or update it yourself!
Now that you're able to run a complete (albeit boring) game, let's get your lights or LEDs configured and make it so they play a show while your machine is in attract mode.
If you're following this tutorial with virtual hardware, it's still worth doing this step because use can use The MPF Monitor to see your lights and LEDs in realtime against a picture of your playfield.
1. Understand "lights"
In MPF, "lights" refers to bulbs that are plugged into a lamp matrix, or to direct-connected LEDs (which are usually RGB). So lights might be either LEDs or lamps in a matrix. See Lights" versus "LEDs" (Some LEDs are lights?!?) for details.
2. Add your lights/LEDs to your machine config file
Once you figure out whether you have lights or LEDs, you need to add the relevant section to your machine configuration file. There's probably not much to explain here. Adding lights is pretty similar to adding switches and coils.
See the relevant documentation for each for instructions how to enter them:
In the following we assume that l_light1 and l_light2 exist. If you
do not have lights with that name make sure to adjust all examples
accordingly or you will run into issues.
If you would like to see a fully working example you can take a look at the two example configurations in LEDs.
3. Create an attract mode light/LED show
Once you add your lights, you need a simple way to test them to make sure they're working. We typically throw together a quick attract mode light show so we can see some blinking lights as soon as MPF boots up.
The easiest way to create a complex series of light actions is with MPF's show functionality. This is the exact same type of show that we use for the display loop, except this time we configure lights for each step instead of slides.
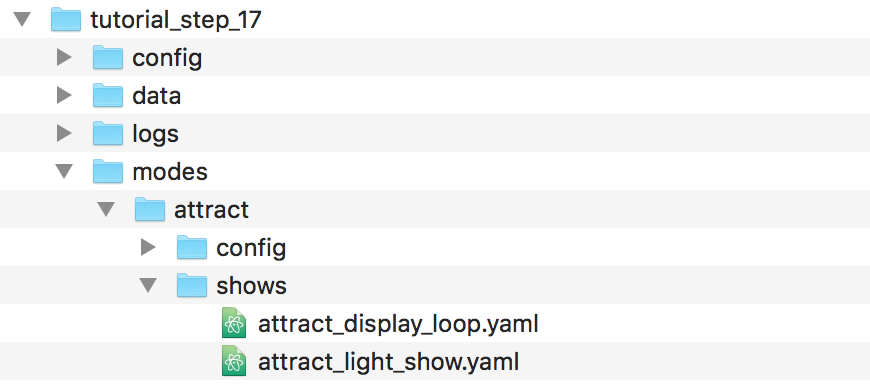
So the first thing to do is to create another show file in your attract
mode shows folders. Let's call this one attract_light_show.yaml. Your
attract mode shows should now look like this:
Note that we started both of these file names with the word "attract". That is certainly not required and you can name them whatever you want. We find it's a bit easier to add the mode name so we can know which files are which when we have a bunch of files open in the editor at the same time.
4. Add some entries to your show
There are all sorts of things you can do with a light show file that
you'll become familiar with as you get deeper into your game
configuration. For now we're just going to create a simple show that
cycles through three lights. We'll call them l_light1, l_light2,
and l_light3, though there's a good chance that you don't have
lights with those names in your machine so you'll have to change them
to names that actually exist for you. If you have matrix lights, add
entries to your attract_light_show.yaml file so that it looks
something like like this:
##! show: attract_light_show
#show_version=5
- duration: 1
  lights:
    l_light2: 0
    l_light1: ff
- duration: 1
  lights:
    l_light1: 0
    l_light2: ff
- duration: 1
  lights:
    l_light2: 0
    l_light3: ff
- duration: 1
  lights:
    l_light3: 0
    l_light2: ff
Matrix lights don't have color setting since their color is determined
by the color of the bulb and/or the color of the insert. So the 0 and
ff values here just represent "off" (0) and "on" (255). If you
look at the four steps in this show, you'll see the first step turns
off l_light2 and turns on l_light1, the next one turns l_light2
and turns off l_light1, etc. In other words, if this show runs in a
loop you'll get a never ending 1-2-3-2-1-2-3-2-1-2-3-2... pattern. If
you have RGB LEDs, then you can have some more fun and actually specify
different colors for each light at each step. For example, if you just
wanted to have a show that cycled three RGB LEDs through the colors of
the rainbow, you could create a show like this:
##! show: attract_light_show
#show_version=5
- duration: 1
  lights:
    l_led1: red
    l_led2: red
    l_led3: ff0000
- duration: 1
  lights:
    l_led1: ff6600
    l_led2: ff6600
    l_led3: ff6600
- duration: 1
  lights:
    l_led1: ffcc00
    l_led2: ffcc00
    l_led3: ffcc00
- duration: 1
  lights:
    l_led1: lime
    l_led2: 00ff00
    l_led3: 00ff00
- duration: 1
  lights:
    l_led1: blue
    l_led2: 0000ff
    l_led3: 0000ff
- duration: 1
  lights:
    l_led1: ff00aa
    l_led2: ff00aa
    l_led3: ff00aa
Obviously this is just the very beginning of what you can do. You can create shows that are hundreds of steps involving dozens of lights. (Notice that if you don't specify a change for a particular light for a step then that light just stays at whatever it was before. In other words, you only have to enter the new values for the lights that change each step----you don't have to enter all the lights from scratch every step.)
Again, notice that for the color of the LEDs, you can specify a color either in the form of a string name or a 6-digit hex color codes. If you go with names, you can use any of these colors.
5. Configure your show to play
This new show file is just like your existing display show, except this
one contains settings for lights. So to get it to play, add it to the
show_player: section of your attract mode config file, set to play on
the mode_attract_started event just like the display show.
The only catch here is that the YAML file cannot have the same setting entered twice. (If you did this, the second one would overwrite the first one which would be really confusing. In fact if MPF sees that, MPF will exit and print a warning about the duplicate so you can fix it.)
MPF offers a way around this though, in that you can add a .1 to the
end of the event name, like this:
##! mode: test_mode
#config_version=5
show_player:
  mode_attract_started: attract_display_loop
  mode_attract_started.1: attract_light_show
Adding the .1 doesn't really affect anything in terms of how this
works, it just makes it so this is valid YAML and both entries get set.
(And you can have more than one, .2, etc. In fact you can have any
number, they don't have to be in order or anything.
You also might be wondering why we don't just make a single attract show and put the slides and lights in the same show?
Certainly that's possible, but we like to keep things separate, as this will let you start and stop them on their own, and it will make it easier to tweak things (like the playback speed) of one thing without breaking other things.
Save your files, and run your game. You should see your light show and the display show start playing once the attract mode starts up.
If you're using the virtual interface without a real pinball machine, this is probably a good time to use the MPF Monitor to see that the light show is actually working. (Expand the "light" or "LED" section in the devices window to see your lights and watch the colors cycle.
6. Speed things up
While it's cool that the show is working, it's kind of lame because it runs so slow with 1 second between steps. So let's speed it up.
You could go into your show and adjust the duration: of each step, but
that's kind of a pain since you have to change every single step, and
it makes it annoying when you're playing with different values.
Instead, we like to tweak the playback speed of the show which is
something we can do in the show_player: entry. (In fact, we almost
always use the duration values in shows as a sort of "relative"
duration of one step to another, and then set the actual speed at play
time.
So if we want each step to be 1/4th of a second, we need to play the
show at 4x the speed. Simple, just add a speed: 4 to the show_player
entry.
#config_version=5
show_player:
  mode_attract_started: attract_display_loop
  mode_attract_started.1: attract_light_show
    speed: 4

# don't try this, it won't work
If you try to run MPF with the config above, MPF will halt with the following error (scroll to the right to see it all):
ValueError: YAML error found in file /mpf-examples/tutorial_step_17/modes/attract/config/attract.yaml. Line 6, Position 10
What gives?
The problem is that entries in YAML files can be either setting names
and values or section names with subsections, but not both. So in the
example above, it sees mode_attract_started.1: attract_light_show as a
setting name and value, but then it also sees speed: 4 indented under
it. The YAML processor doesn't know what to do?
To fix this, we need to make a slight change to our YAML file, like this:
##! mode: test_mode
#config_version=5
show_player:
  mode_attract_started: attract_display_loop
  mode_attract_started.1:
    attract_light_show:
      speed: 4
What we've done is moved the show name (attract_light_show) under the
event name (mode_attract_started.1), and then we added the speed
setting under there.
If you wanted to, you could consolidate the duplicate
mode_attract_started entries like so:
##! mode: test_mode
#config_version=5
show_player:
  mode_attract_started:
    attract_display_loop:
      speed: 1
    attract_light_show:
      speed: 4
Either option is fine, and you'll probably end up with both techniques scattered throughout your configs.
7. Configure more light shows to all run at once
The simple light show with two or three lights is a good first step, but it's hardly what could be considered a "real" attract mode light show. Unfortunately if you look at a real pinball machine, you might be overwhelmed by all the crazy light action. But if you really look closely, you'll realize that the super-complex looking light shows on real pinball machines are just lots of little shows all running at the same time.
For example, look at how we can break down the attract mode light show of Demolition Man:
So if we were creating the attract mode light show like this for MPF, we would actually create lots of little shows each with just a few lights in them. Then we'd end up with a list of show files, like this:
- flipper_red_flashing.yaml
- purple_mode_sweep.yaml
- inlane_alternating.yaml
- random_flashing.yaml
- car_chase_sweep.yaml
- ramp_orbit_sweep.yaml
- right_orbit_sweep.yaml
- claw_sweep.yaml
- mtl_sweep.yaml
- center_ramp_sweep.yaml
- standups_sweep.yaml
Again, we'd make every step of every show have a duration of 1. Then in
our show_player: configuration, we'd configure the list of shows to
play when the attract mode starts instead of just one. For example:
show_player:
    mode_attract_started:
      attract_display_loop:
        speed: 1
      flipper_red_flashing:
        speed: 2
      purple_mode_sweep:
        speed: 4
      inlane_alternating:
        speed: 3
      random_flashing:
        speed: 2
      car_chase_sweep:
        speed: 3
      ramp_orbit_sweep:
        speed: 5
...(truncated. you get the idea)
(If you were really duplicating the Demolition Man attract mode light show, you'd also want to implement a play list which plays sets of shows in timed sequences since the real machine does one thing with the lights for a few seconds, then another, etc.
Check out the complete config.yaml file so far
If you want to see a complete config.yaml file up to this point, it's
in the mpf-examples/tutorial/step_17 folder with the name
config.yaml. You can run it be switching to that folder and running
mpf both:
C:\mpf-examples\tutorial_step_17>mpf both
Something missing or wrong? You can fix it!
This website is edited by people like you! Is something wrong or missing? Is something out of date, or can you explain it better?
Please help us! You can fix it yourself and be an official "open source" contributor!
It's easy! See our Beginner's guide to editing the docs.
Page navigation via the keyboard: < >
You can navigate this site via the keyboard. There are two modes:
General navigation, when search is not focused:
- F , S , / : open search dialog
- P , , : go to previous page
- N , . : go to next page
While using the search function:
- Down , Up : select next / previous result
- Esc , Tab : close search
- Enter : go to highlighted page in the results