How to configure a PIN2DMD RGB LED DMD
This section is maintained by the hardware maker
This section of the MPF website is about a specific company's pinball controller hardware, and they are responsible for maintaining the content here.
Of course feel free to edit, add, and/or correct things if you want, but if something seems weird, reach out to the hardware maker, not the MPF maintainers. ;)
Related Config File Sections:
This guide explains how to connect a PIN2DMD RGB LED DMD to a pinball machine running MPF.
PIN2DMD is a RGB DMD display which connects to a PC via USB. It exists in a 128x32 (traditional pinball) and 192x64 pixel (large SEGA/Data East displays) version.
MPF supports several different types of RGB DMDs, and the PIN2DMD is just one of the options. More information about this type of display and other options that MPF supports is available in the Using an RGB full-color LED DMD documentation.
Overview video about Pin2DMD:
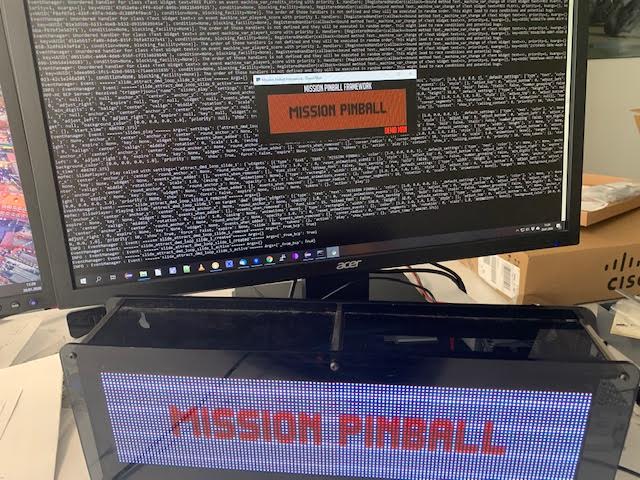
This is how a 128x32 pixel PIN2DMD looks in action:
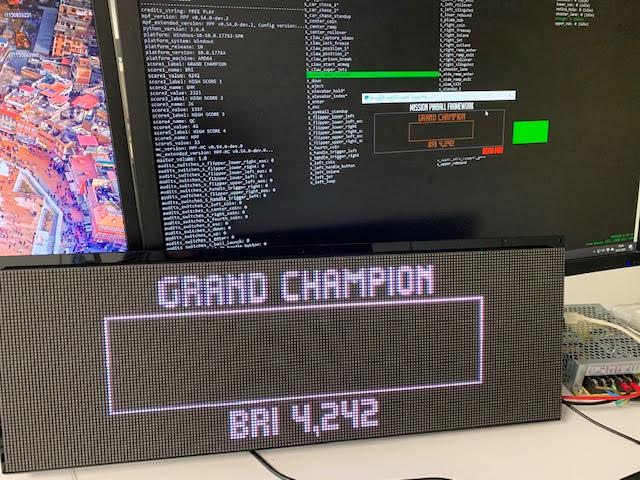
And this is how a 192x64 pixel PIN2DMD looks:
1. Buy and Assemble your PIN2DMD
To use PIN2DMD in MPF you should first install your panel as described on the PIN2DMD homepage (steps hardware and firmware).
2. Install pyusb
MPF uses libusb via pyusb to drive your PIN2DMD. To use your PIN2DMD you need to install pyusb using pip:
pip3 install pyusb
3. Configure your PIN2DMD hardware settings
Once you have your hardware all set, you need to add a smartmatrix:
section to your machine-wide config and which tells MPF how to talk to
RGB DMDs that use the SmartMatrix platform.
- Add pin2dmd to your hardware section:
hardware:
  rgb_dmd: pin2dmd
pin2dmd:
   # debug: True           # uncomment this if you experience any issues and need debug output
  resolution: 128x32       # or 192x64 depending on your panel
  panel: rgb               # or rbg if colors are swapped
3. Add a physical RGB DMD device entry
Once you have your SmartMatrix hardware platform set, you need to create the actual device entry for the RGB DMD and map it back to the SmartMatrix platform.
You do this in the rgb_dmds: section of the machine config. This
section is like the other common sections (switches, coils, etc.) where
you enter the name(s) of your device(s), and then under each one, you
enter its settings.
(And yes, in case you're wondering, it's possible to have more than one physical DMD.)
To do this, create a section in your machine-wide config called
rgb_dmds:, and then pick a name for the DMD, like this:
rgb_dmds:
  default:  # your DMD
    hardware_brightness: .5      # adjust the brightness of your display if it is too bright
    fps: 30
There are several settings you can enter here. (See the
rgb_dmds: for details.). For
PIN2DMD the display currently has to be named default because there
can be only one PIN2DMD connected.
You'll probably also want to configure the brightness, which is a
multiplier from 0.0 to 1.0 that's applied to every pixel that's sent
to the DMD. In other words, the example of hardware_brightness: .2
means that each pixel will be shown at 20% brightness. (These things are
crazy bright!)
4. Set a source display
Now that you have everything configured, the last step is to make sure the DMD knows what content to show. In MPF, you do this by mapping a physical DMD to an MPF display.
displays:
  window:  # on screen window - useful for debugging without real hardware
    width: 600
    height: 200
  dmd:  # source display for the DMD
    width: 128      # 192 if you got a 192x64 pin2dmd panel
    height: 32      # 64 if you got a 192x64 pin2dmd panel
    round_anchor_x: left
    default: true
By default, the DMD will look for a display (in your
displays: section called "dmd".
However you can override this and configure the DMD to use whatever
logical display you want by setting a source_display: setting. (Just
make sure that the width and height of your source display match the
physical pixel dimensions of the DMD or else it will be weird.)
A final config you can test
At this point you're all set, and whatever slides and widgets are shown on the DMD's source display in MPF-MC should be shown on the physical RGB DMD.
That said, all these options can be kind of confusing, so we created a
quick example config you can use to make sure you have yours set right.
(You can actually just save this config to config.yaml in a blank
machine folder and run it to see it in action which will verify that
you've got everything working properly.)
To run this sample config, you can either run mpf both.
When you run it, do not use the -x or -X options, because either of
those will tell MPF to not use physical hardware which means it won't
try to connect to the Teensy.
Note that the Using an RGB full-color LED DMD guide has more details on the window and slide settings used in this machine config.
hardware:
  rgb_dmd: pin2dmd
pin2dmd:
  # debug: True           # uncomment this if you experience any issues and need debug output
  resolution: 128x32      # or 192x64 depending on your panel
  panel: rgb              # or rbg if colors are swapped
displays:
  window:  # on screen window
    width: 600
    height: 200
  dmd:  # source display for the DMD
    width: 128      # 192 if you got a 192x64 pin2dmd panel
    height: 32      # 64 if you got a 192x64 pin2dmd panel
    default: true
    round_anchor_x: left
window:
  width: 600
  height: 200
  title: Mission Pinball Framework
rgb_dmds:
  default:
    hardware_brightness: .2
    fps: 30
slides:
  window_slide_1:    # slide we'll show in the on-screen window
    - type: display  # this widget shows the DMD content in this slide too
      effects:
        - type: color_dmd
      width: 512
      height: 128
    - type: text
      text: MISSION PINBALL FRAMEWORK
      anchor_y: top
      y: top-3
      font_size: 30
      color: white
    - type: rectangle
      width: 514
      height: 130
      color: 444444
  dmd_slide_1:  # slide we'll show on the physical DMD
    - type: text
      text: IT WORKS!
      font_size: 30
      color: red
slide_player:
  init_done:
    window_slide_1:
      target: window
    dmd_slide_1:
      target: dmd
What if it did not work?
Have a look at our Pin2DMD hardware troubleshooting guide.
Something missing or wrong? You can fix it!
This website is edited by people like you! Is something wrong or missing? Is something out of date, or can you explain it better?
Please help us! You can fix it yourself and be an official "open source" contributor!
It's easy! See our Beginner's guide to editing the docs.
Page navigation via the keyboard: < >
You can navigate this site via the keyboard. There are two modes:
General navigation, when search is not focused:
- F , S , / : open search dialog
- P , , : go to previous page
- N , . : go to next page
While using the search function:
- Down , Up : select next / previous result
- Esc , Tab : close search
- Enter : go to highlighted page in the results