Pololu Maestro Servo Controller
Related Config File Sections:
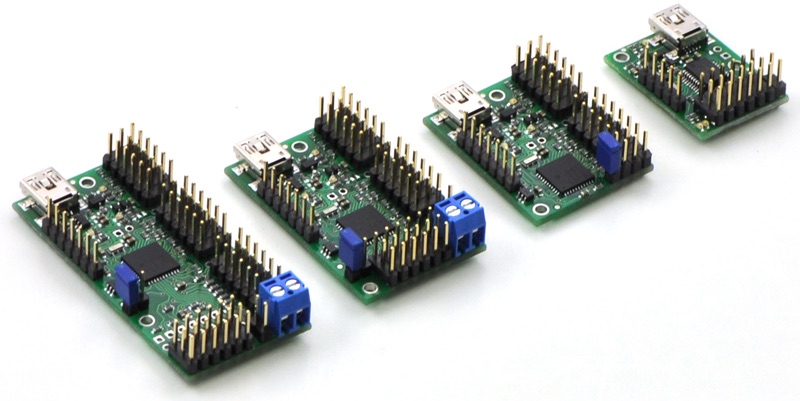
MPF supports servos connected to Pololu Maestro servo controllers. Each Maestro can control multiple servos, with models that control 6, 12, 18, or 24 servos.
Here is an explanation video by the pinball amigos on how to setup a pololu maestro (and more):
Overview video about servos:
1. Install the Pololu Maestro drivers
Just like any hardware device you connect to a computer, you need to install the drivers so your computer can see it. It is easier to do the initial hardware configuration on a Windows PC. Follow the "Getting Started" section of the Pololu Maestro Servo Controller User's Guide. You will need to set Maestro's serial mode to USB Dual Port on the Serial Settings tab of the Maestro Control Center.
2. Configure your hardware platform section
Next, you need to tell MPF that you want to use the pololu_maestro
platform for servos. (MPF supports several different models of servo
controllers.)
To do this, add servo_controllers: pololu_maestro to the hardware:
section of your machine-wide config file, like this:
hardware:
  servo_controllers: pololu_maestro
This tells MPF that you want the default servo platform to be
pololu_maestro. If you happen to be using multiple different types of
servo controllers, you can override the default by adding a platform:
entry to individual servo devices (just like any device in MPF that can
have its platform overwritten in the device config).
3. Configure the serial port
Next, you need to tell MPF what port the Maestro is connected to. (Note that when you plug in the Maestro, you'll see two serial ports appear. You want to use the first one (the lower number).
Add a section to your machine-wide config like this:
pololu_maestro:
  port: COM5
On Linux or Mac, it will probably look like this:
pololu_maestro:
  port: /dev/ttyACM0
4. Add your servo devices
Now that all your hardware is configured, you can add the actual servos
to your machine config. In MPF, servos are just like any other device
(light, LEDs, coils, etc.) You add a servos: section to your config,
and then create sub entries in there for each servo you have.
For example:
servos:
  servo1:
    servo_min: 0.2
    servo_max: 0.8
    positions:
      0.1: servo1_down
      0.9: servo1_up
    reset_position: 0.5
    reset_events: reset_servo1
    speed_limit: 0.5
    acceleration_limit: 0.5
    number: 1
  servo2:
    positions:
      0.2: servo2_left
      1.0: servo2_home
    reset_position: 1.0
    reset_events: reset_servo2
    number: 2
Okay, there's a lot going on in there. Let's break it down.
First, all these config options are explained in-depth in the servos: section of the config file reference. But let's point out a few Maestro-specific things here.
The number: of the servo is simply which channel on the Maestro board
each servo is connected to. These numbers start with 0, so a Micro
Maestro 6 supports six servos via numbers 0-5, the Mini Maestro 12
supports twelve servos numbered 0-11, etc.
All servo positioning in MPF is controlled via a floating point value from 0.0 to 1.0. In other words, if you tell a servo to go to position 0.0, that will be one end of its motion, and position 1.0 will be the other end. A value of 0.4 will tell the servo to move to a position that's 40% along from the start limit to the stop limit, etc.
So that's universal, 0.0 - 1.0, throughout MPF.
The way servos actually move to a position is that the servo controller sends a series of microsecond-level pulses which the servo reads and can then translate into a certain position. The actual value of these pulses varies depending on the servo controller and servos you actually have.
You may also set servo_min and servo_max if the servo is trying to move beyond its (hardware) limits when setting it to position 0.0 or 1.0. Those two values will be applied to all positions. For instance, if you move it to 0.0 it will actually move to servo_min (0.2 in the example) and to servo_max for 1.0 (0.8 in the example). Everything in between will be interpolated.
The Pololu Maestro servo controllers can accept speed and acceleration
settings which specify how fast the servo moves to the new position, and
how (or whether) it accelerates and decelerates when starting and
stopping. If you want to use these add the speed_limit: and
acceleration_limit: settings to your config.
5. Using the servo in your game
The servo's position: setting contains a list of numerical servo
values mapped to MPF events. So to move a servo in your game, just add
the position you want to the list and then post that event.
Again, see the servos: section of the config file reference for details.
6. Future enhancements
Multiple Pololu Maestro controllers can be chained together (via a single USB port). We don't have support for that yet. (It requires adding and additional address setting to the servo config.) If you want that, let us know and we'll add it.
What if it did not work?
Have a look at our hardware troubleshooting guide.
Something missing or wrong? You can fix it!
This website is edited by people like you! Is something wrong or missing? Is something out of date, or can you explain it better?
Please help us! You can fix it yourself and be an official "open source" contributor!
It's easy! See our Beginner's guide to editing the docs.
Page navigation via the keyboard: < >
You can navigate this site via the keyboard. There are two modes:
General navigation, when search is not focused:
- F , S , / : open search dialog
- P , , : go to previous page
- N , . : go to next page
While using the search function:
- Down , Up : select next / previous result
- Esc , Tab : close search
- Enter : go to highlighted page in the results