Coils (Solenoids)
Related Config File Sections:
Warning
Please ensure that you have established common ground between logic and coil power before turning on high voltage on your coils (especially on homebrew machines). Ignoring this might lock on your coils, overheat them, burn down your house or kill you. We are serious, floating grounds are dangerous. If you are not an electrical engineer read the guide about voltages and power.
In a nutshell: You need to connect your logic ground (5V/12V) and your high voltage ground (48V or 80V). A power entry or power filter board is a convenient solution to solve this (and more) issues.
Always turn all PSUs off when connecting power or you might fry all boards at once. This is generally a good idea but even more important when connecting more than one power supply to a board.
IF YOU DID NOT UNDERSTAND WHAT THIS WARNING MEANS STOP NOW AND TRY TO UNDERSTAND IT. OTHERWISE YOUR HARDWARE WILL LIKELY BURST INTO FLAMES AND YOU NEED TO WAIT A FEW DAYS FOR A REPLACEMENT OR EVEN WORSE IT MIGHT KILL YOU. IGNORING THIS IS THE MOST COMMON CAUSE FOR BROKEN DRIVER BOARDS.
In MPF, you typically list all the coils in your machine in the coils: section of your machine configuration file, along with default options for them, like pulse times, PWM values, whether they can be enabled (held on), etc.
You don't typically work with coils directly, rather, you tend to add them to other devices once they've been defined (flippers, autofires, ball devices, diverters, etc). You can configure /tutorial/3_get_flipping on top of coils.
That said, it is possible to perform actions on coils directly, such as
pulsing, enabling, or disabling them. You can do this via the
coil_player: section of a config
file or via the coils: section of a
show.
Hardware
Connecting Coils
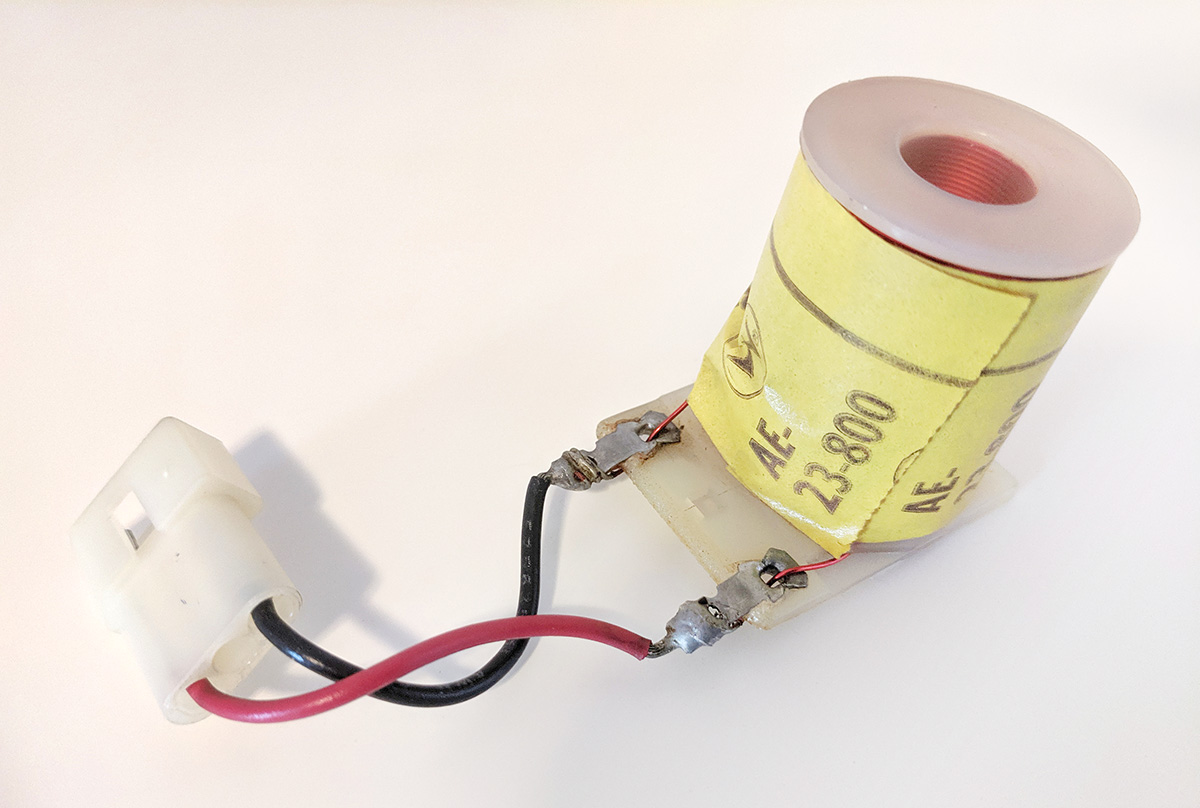
If you coil has more than two terminals please have a look at /tutorial/3_get_flipping because you got a dual-wound coil-If your coil has two terminals it is a single wound coil.
TODO: Add a picture a single wound coil with diode TODO: Add a electrical drawing a single wound coil with diode
In general, polarity does not matter for a coil. However, there might be a diode between the terminals of your coil which needs to be inverse to the voltage. This means that at the side of the stripe of the diode is where you connect high voltage. Normally, diodes are in the opposite direction but in this case this is intentional to short the coil when it deactivates (because of self-induction).
If you are unsure about the direction of your diode measure the resistance between the two terminals in both directions. You should get 1-300 ohms (depending on the coil) in on direction and almost zero in the other direction. Connect the coil in the direction with higher resistance. Plus/red plug of your multimeter would be where high voltage is connected. We recommend a diode on any coil to prevent interferences and damages to your driver boards.
Most machines use a common color for high voltage and an individual color for the return terminal of the coil. The "output" of your driver board is usually considered ground for the coil and the other terminal is connected to high voltage. Check with the documentation of your hardware platform to confirm this but it should be the case for all modern machines.
Video about wiring coils:
Strength and Current
Coils vary in strength relative to the pulse time you use. The strength
of the magnetic field of a coil is a product of some constant u, the
current I and the number of windings N divided by the length of the
coil L: B = u * I * N / L
The length of coils in pinball is almost the same for most coils (3.5cm; so ignore that). However, the number of windings is not. Additionally, the thickness of the wire differs between coils which influences how much current can flow though the coil. Thicker wires generally means stronger coils. Unfortunately, this is not generally true for windings even though the formula above suggests it. The reason is for that more windings also mean longer wires which will result in higher resistance and less current. At least for typical coils in pinball more windings means slightly less powerful.
If you want to compare the strength of different coils you can get the number of windings and their resistance from one of the following pages:
Get windings N and resistance R from the chart. To get the current
you can use I = U/R. Depending on your power supply U is either 48
or 70V. Length is roughly 3.5cm for most coils.
Relative strength: s = U / R * N / L. More is stronger. In most cases
you can leave out L as this is not terribly scientific anyway (and
there is slightly more to it but this should be a good start). In
general, reducing resistance R (by using thicker wires) will give you
more powerful coils.
Video about electronics basics:
Config
This is an example for a single-wound coil:
coils:
  c_your_coil:
    number: 00   # depends on your platform and hardware
    default_pulse_ms: 20
This is an example for dual-wound coils which are configured separately:
coils:
  c_your_coil_main:
    number: 00   # depends on your platform and hardware
    default_pulse_ms: 20
  c_your_coil_hold:
    number: 01   # depends on your platform and hardware
    default_pulse_ms: 10
    default_hold_power: .2
See /tutorial/3_get_flipping for more details.
Related How To guides
pulse_power hold_power recycle dual_wound_coils dual_vs_single_wound
Something missing or wrong? You can fix it!
This website is edited by people like you! Is something wrong or missing? Is something out of date, or can you explain it better?
Please help us! You can fix it yourself and be an official "open source" contributor!
It's easy! See our Beginner's guide to editing the docs.
Page navigation via the keyboard: < >
You can navigate this site via the keyboard. There are two modes:
General navigation, when search is not focused:
- F , S , / : open search dialog
- P , , : go to previous page
- N , . : go to next page
While using the search function:
- Down , Up : select next / previous result
- Esc , Tab : close search
- Enter : go to highlighted page in the results